Slipper socks
I wanted to make my dad a pair of socks that were thick, heavy, and warm, primarily for puttering around the house in. So aside from wanting a relatively bulky yarn, I wanted a pattern stitch across the top that would trap more air than the usual stockinette stitch, and I wanted the soles to be a bit sturdier to stand up to the extra wear.
These were a rush job; I didn't buy the yarn until 28 June, and Dad's birthday is 11 July. Fortunately, with the heavier yarn, they knit up really fast. I cast on the first sock that evening, and was most of the way through it by the next day. That one I grafted off the following Wednesday, 2 July, and cast on the second sock on 4 July on the way to a barbecue, finishing it up the next Tuesday, the 8th. I was sort of inventing the pattern as I went along, so the socks turned out to be slightly different, though you have to look closely to see where.
Pattern
Cast on 36 stitches in cable cast-on, and rearrange (if you don't cast on directly like this) to 12 on each of three needles.
Do six rounds, or about 1", of k2p2 rib.
Do twenty rounds, or about 3", of seed stitch. Somewhere in the first round, use your favourite increase to put the total stitch count at 37.
Seed stitch
- Round 1: *k1, p1, rpt from *
- Round 2: *p1, k1, rpt from *
- Repeat rounds 1 and 2. Note that if the total stitch count is odd, the last stitch of round 1 will be knit, thus making a seamless pattern when round 2 commences with a purl. (This is why we increase to 37 in the first row.)
Heel flap
Now we prepare for the heel flap. Onto a single dpn, knit 19 stitches. (This will be all the stitches from one dpn plus half from another.) Remaining needles will have a total of 18 stitches; distribute them evenly, and proceed to ignore them for awhile.
Turn the work. You will be holding the main needle (the one with 19 stitches on), and looking at the inside, or purl side. Use spare dpn to purl across. This is what will become the heel flap.
Turn the work again. Do 12 rows of heel stitch back and forth.
Heel stitch
- Row 1: s1, *k1, s1, rpt from *
- Row 2: purl across
- Repeat rows 1 and 2.
Turning the heel
- Row 1: s1, k8, k2tog, k1, turn. (This is in the middle of the row, and is part of a technique known as a "short row".)
- Row 2: s1, p1, p2tog, p1, turn.
- Row 3: s1, k2, k2tog, k1, turn.
You may be noticing a pattern. We are knitting (or purling) a little farther past the centre each time, decreasing by one each row. Once the pattern has been set up, you will know exactly where the decrease goes in each row, because the two loops that will be bound together are farther apart than usual (because one is the slipped stitch from the previous row, and one is a stitch from the row before the short-rowing started). Seeing this makes for a much less stressful heel-turning experience, as you won't be worrying about counting every row!
Continue turning the heel until you p2tog the last two stitches in a row. You're now done turning the heel and need to start the heel gusset.
Heel gusset
Right now, you have 9 (10?) stitches on one needle at the end of the heel, and 18 on the other two, and quite a gap between them that we need to fill. The way we will do this is by picking up the slipped sides of the heel flap as loops on the extra needle---loops don't care where they came from and are happy to be knitted into, regardless of the fact that we will be looking at them "sideways". So, thread the extra needle through these stitches (there should be 8), then use the heel needle (or a 5th needle, if you have one) to k1b across the picked-up stitches. Why k1b? Because these slipped stitches are loose, and a regular knit stitch will cause a lot of little holes; but a k1b will twist the loops, tightening them and preventing them from forming holes.
Knitting through the back of the loop (k1b)
This technique causes the stitch to twist, making it tighter. It's used when picking up loose stitches (to avoid causing holes) and as decorative variation.
The trick to getting this stitch right is to remember that what a "knit" stitch does is to bring the yarn forward through a loop. The k1b stitch does this too---the yarn starts out in back like a regular knit stitch, and is brought forward. But instead of putting the needle into the loop in a rightward direction (pointing roughly the same way as the other needle) and pulling the yarn leftwards, a k1b stitch involves putting the needle into the loop in a leftward direction (pointing the opposite direction from the other needle) and pulling the yarn rightwards. What makes this different from a purl stitch---which inserts the needle the same way into the loop!---is that the inserted needle will go leftwards into the loop and behind the other needle, where a purling needle will go in front of the other needle.
When you get to the end of that needle, use the current needle to knit 3 stitches off the next needle, bringing you to 11 stitches (8 off the side of the heel flap, and 3 off the top of the foot). Now, on a new needle, knit in pattern (seed stitch) across the entire top of the foot (two needles), to the last three stitches.
Knit these three stitches onto a fresh needle, then use a free needle to pick up the 8 stitches from this side of the heel flap, and k1b them onto the same needle; then knit 5 stitches onto the same needle. On a fresh needle, knit the next needle straight across.
That's all a bit confusing. At this point, you should have:
- Needle 1: 12 stitches of pattern (seed stitch)
- Needle 2: 16 stitches comprising the left side of the foot and half the sole
- Needle 3: 15 stitches comprising the right side of the foot and half the sole
By comparison, the actual heel gusset is easy, although this pattern's is harder than usual as the sole isn't simple stockinette. I've used a linen stitch for the entire sole.
Linen stitch
- Row 1: *s1, k1, rpt from *
- Row 2: *k1, s1, rpt from *
- Repeat rows 1 and 2.
This stitch gives a pattern that at first glance looks a lot like stockinette. But rather than a bunch of V-shaped stitches appearing in a horizontal grid, these appear in a diagonal grid, because in any given row, only every other stitch is knit. Behind every stitch there is a carried bit of yarn from the row where that stitch was slipped. This makes the end pattern thicker and sturdier, though less flexible. Perfect for, say, the sole of a slipper.
The actual heel gusset works as follows:
- Row 1: needle 1---continue seed stitch. needle 2---k1, ssk, k6, PM, linen stitch to end of needle. needle 3---linen stitch for 7 stitches, PM, k6, k2tog, k1.
- Row 2: needle 1---seed stitch. needles 2 and 3---knit across to marker, linen stitch between markers, knit to end.
- Row 3: needle 1---seed stitch. needles 2 and 3---k1, ssk, knit to marker, linen stitch between markers, knit to last 3 stitches, k2tog, k1.
- Repeat rows 2 and 3, three more times.
Foot
For about 8 rows: needle 1---work in pat. needles 2 and 3---k5 (to marker), work in pat to marker (7 stitches on each needle), k5 to end of needle.
At this point we widen each pattern by one stitch on each end. This entails moving one stitch from each of needles 2 and 3 onto needle 1 to work the pattern properly. (I actually moved 2 at each end to give me a k1 at each end of needle 1.) The added linen stitches don't require moving stitches, but you will need to move both markers.
For about 10 rows: needle 1---k1, work in pat (14 sts), k1. needles 2 and 3---k2, work in pat (total of 16 stitches, 8 on each needle), k2.
Now we widen the sole by one more stitch on each end; the top of the slipper (on needle 1) remains as it is.
Remainder of foot until toe: needle 1---k1, work in pat (14 sts), k1. needles 2 and 3---k1, work in pat (total of 18 stitches, 9 per needle), k1.
Begin decreasing for the toe when about 1-1/2" from desired length of slipper.
Decreasing for the toe
- Row 1: needle 1---k3, work in pat (seed) to 3 from end, k3. needles 2 and 3---k3, work in pat (linen) to 3 from end, k3.
- Row 2: needle 1---k1, ssk, k1, work in pat (seed) to 4 from end, k1, k2tog, k1. needles 2 and 3---k1, ssk, k1, work in pat (linen) to 4 from end, k1, k2tog, k1.
- Rows 3-4: repeat rows 1-2.
(Check count: needle 1: 12 sts; needles 2 and 3: 8 sts each.)
- Row 5: needle 1---as for row 1. needles 2 and 3---as for row 2.
- Row 6: repeat row 2.
- Rows 7-8: repeat rows 5-6.
Check the count again: needle 1 should have 8 sts, and needles 2 and 3 should have 4 each. Congratulations! Combine needles 2 and 3 onto a single needle, and you are ready to graft the toe together.
Grafting the toe
Cut the yarn about a foot from the sock; this will be used for grafting the top and bottom of the sock together in such a way that the seam will be completely invisible. This is most easily accomplished with a tapestry needle; in a pinch, a crochet hook might do the trick (but it'll be a lot harder).
Thread the tapestry needle and hold the work so that the end of the yarn is at the back---thus the top of the sock (seed stitch) is facing you. Commence with the kitchener stitch.
Kitchener stitch
- Slip the rightmost stitch on the front dpn as if to knit onto the threaded tapestry needle; draw the needle through the stitch (loosely).
- Insert the tapestry needle as if to purl into the next stitch on the front needle, but do not slip it off. Draw the needle through the stitch (again, loosely).
- Slip the rightmost stitch on the back dpn as if to purl onto the tapestry needle, and loosely draw the needle through.
- Insert the tapestry needle as if to knit into the next stitch on the back needle, but do not slip it off. Loosely draw the needle through the stitch.
- You have now removed one stitch from each needle. Repeat.
When you're down to one stitch on each needle, slip as if to knit from the front needle, and slip as if to purl from the back needle. Now go back and tighten up all the loose stitches in the graft, starting back at the right end and working leftwards. If all went well, you'll now have a long tail hanging off the toe; using the tapestry needle or a crochet hook, draw it to the inside of the sock and weave it through a bunch of stitches. Do likewise for the tail from the slipknot where you started (remember to tighten the slipknot first). You're done!
Materials
Four short US-8 bamboo dp needles; tapestry needle; Encore colorspun worsted weight (75% acrylic, 25% wool), colour #7118. Claimed to be machine washable and dryable at 80 degrees. One 3.5oz ball, at 200 yards, was enough for a small swatch and both slippers, though the leftover was pretty minimal---I was definitely glad to have the second ball on hand.
Pictures
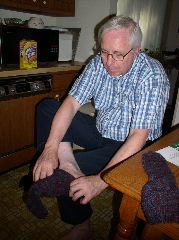
Dad tries on his slippers |
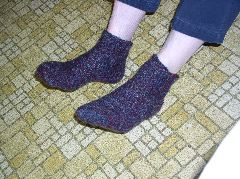
They fit! |